STEP 1 – Ingredients
• 1 Tub of Crisco – (It was OK for Grandma… so it's ok for us, you can substitute a healthier alternative if you wish)
• Chicken – (We typically fry 10-12 pieces at a time, although you can use more or less, but you might need to adjust your oil level)
• 4 cups Rice Flour or AP Flour or Self-Rising Flour
• 3 Eggs
• 1/2 cup Water or Milk
• Salt, Pepper and Hot Sauce To Taste
STEP 2 – Preparation
Scrub and clean your kitchen sink.
Fill 1/2-3/4 of the way with cold water.
While chicken is taking a swim in its ice bath, add Crisco to a high sided pan and bring to 350 degrees.
Use a large skillet with 4″ sides. We've also used stock pots, cast iron and Dutch oven style pots. The ultimate goal is to have the oil come half way up your thickest piece of chicken. We typically put in 1/2 the container and go from there!
Lay two plates or baking dishes on the counter.
Add flour to one (no need to season, it will come off during the frying process), and crack the eggs onto the other.
Whisk eggs with a fork and add in water. Take a piece of chicken out of the ice bath and shake it off and pat dry with a paper towel.
Lay it into the flour to cover, shake, and then drag it through the milk-egg mixture.
Let any extra egg/milk mixture drain and place it back into the flour plate.
STEP 3 – Fry Up Your Chicken
Using tongs, place chicken into oil one piece at a time. Lay chicken in away from you just in case a splash occurs.
Cover pan.
Set timer for 6 minutes.
Don't peek, don't sweat it… it will be ok.
After 5 minutes, check the first piece of chicken added to the pot. Usually we find that an additional 2-3 minutes is ideal but checking at the 5 minute mark means no one's getting too crispy without your approval first.
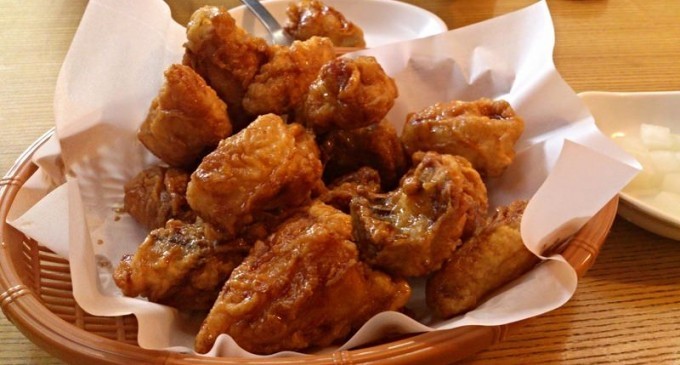
You want a goldeny-brown “typical” fried chicken color.
Once that's achieved, flip the pieces over and salt and pepper the freshly fried side.
It must be done quickly before the grease on top of the piece cools or dries. If after cooking on both sides the chicken isn't dark enough, you may continue flipping, but the longer it sits in the grease, the greasier it will be!
Adjust your temperature or time as needed to try to cook only once on each side. 8 minutes per side is usually great. Remove chicken from pan and place on paper towels.
STEP 4 – Enjoy!
As you can see, this recipe is so simple, even the worst of chefs can prepare their own version of Grandmas fried chicken! Simply follow the instructions and bring your appetite to the dinner table.
Have you ever fried up something other than chicken? Tell Us About It! Frying up chicken is a tough task but if you are attentive and careful then it can be simple and deliciously-rewarding. Give us your tips and tricks on frying up your favorite dishes and what we should always look out for.
For more about this delicious recipe, visit the: The Kitchen


After you’re done battering the chicken, you should place it on a cookie sheet to let the batter set up for about 15 min…otherwise the batter will fall off if it’s too wet when it goes in the oil…also, I use a cast iron skillet; it makes the best chicken fried chicken!!
Looks good
Deannie Skrhak Crim
Nayda Amescua
looks delish!